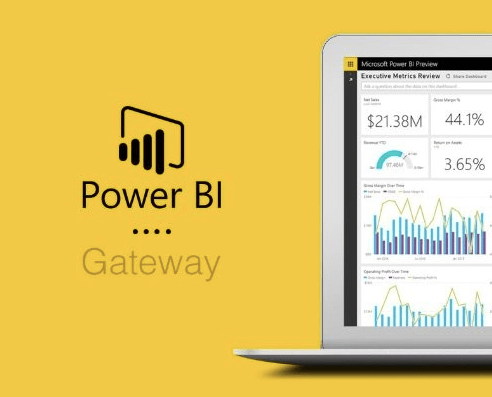
The Power BI Gateway serves as a bridge, facilitating secure and efficient data transfer between the Power BI service and the data sources residing either on-premises or in other networks. The underlying principle of the Power BI Gateway is to augment the versatility of the Power BI ecosystem, enabling users to utilize their data, irrespective of where it resides.
In this article, we’ll delve into the ways Power BI Gateway enhances your data connectivity and accessibility, making sure that data is always at the fingertips of those who need it.
What is Power BI Gateway?
Power BI Gateway is a bridge that facilitates secure data transfer between on-premises data sources and Microsoft Power BI cloud service. It acts as a relay, ensuring no direct connection between Power BI cloud service and on-premises data sources, enabling dataset refreshes and running cloud-based queries over on-premises data.
Power BI offers two gateways: the On-premises data gateway and the Personal Mode. While the former is intended for enterprise-level usage and can be used by multiple users, the latter is designed explicitly for single-user scenarios.
Users install it on an on-premises machine to make the most of Power BI Gateway. Once installed and configured, the gateway ensures that Power BI cloud service can maintain scheduled refreshes or direct query data sources without storing your on-premises data source credentials in the cloud. It serves as the intermediary, ensuring all requests from the cloud are authenticated and directed appropriately to the on-premises data source.
Benefits of Using Power BI Gateway
Power BI Gateway bridges on-premises data sources and Microsoft’s Power BI cloud services. Leveraging it offers numerous advantages, from secure data transfer to real-time access, making it a vital tool for efficient and protected data analytics.
| Benefit | Description |
| Secure Data Transfer | Power BI Gateway ensures encrypted and compressed data transfer, reducing the risk of data breaches during transmission. |
| Real-time Data Access | Direct query capabilities enable cloud-based real-time querying of on-premises data without moving it to the cloud. |
| Centralized Data Management | Allows organizations to keep their data on-premises, centralizing data management and governance. |
| Flexible Refresh Schedules | Scheduled refresh options ensure that dashboards and reports always use updated data from on-premises sources. |
| No Need for Cloud Storage of Credentials | Provides an added layer of security by not storing on-premises data source credentials in the cloud. |
| Interoperability with Other Services | Besides Power BI, the gateway is compatible with Azure Logic Apps, Microsoft Flow, and Azure Analysis Services. |
| Efficient Communication | Uses Azure Service Bus for optimized, secure, and efficient communication between cloud service and the gateway. |
| Scalability | The Power BI Gateway enterprise mode can cater to multiple users, offering scalability for larger organizations. |

Types of Gateways
In data management and analytics, gateways enable secure and seamless connections between varied data environments.
Especially when dealing with cloud and on-premises infrastructures, gateways act as intermediaries to facilitate data transfers and queries. The Power BI Gateway stands out, offering distinct types tailored to different organizational needs, enhancing data accessibility while ensuring security.
Personal Mode Gateway
The Personal Mode Gateway, often referred to simply as the “Power BI Gateway – Personal,” is a tool provided by Microsoft to facilitate secure data transfer from on-premises data sources to Power BI, Microsoft Flow, PowerApps, and more, without the need to move the data. It acts as a bridge, providing quick and secure data transfer between the on-premises data and Azure cloud-based services.
Key Features:
- Ease of Setup: Users can install and configure the gateway on their computers without requiring administrative rights.
- Automatic Data Refresh: It supports scheduled refreshes and always ensures that reports and dashboards in Power BI reflect the latest data.
- Multiple Service Support: While it’s commonly associated with Power BI, the Personal Mode Gateway also supports Microsoft Flow, PowerApps, and other Azure services.
- Secure Data Transfer: Data transferred via the gateway is encrypted during transit, ensuring data integrity and confidentiality.
Standard Mode Gateway
The Standard Mode Gateway, commonly referred to as the “Power BI Gateway – On-Premises,” is designed to facilitate the secure and seamless transfer of data between on-premises data sources and Microsoft’s cloud services such as Power BI, PowerApps, Azure Logic Apps, and Microsoft Flow. This gateway enables organizations to keep their data on-premises while leveraging cloud-based analytics and business intelligence tools.
Key Features:
- Cluster Support: Allows creation of clusters with multiple gateway instances for high availability.
- Enterprise Scale: Designed for larger-scale implementations compared to the Personal Mode Gateway.
- Multiple Users: An administrator can use different users within the organization once configured.
- Advanced Data Sources: Supports a broader array of on-premises data sources.
- Secure Data Transfer: Ensures data security during transfer with encryption.
On-Premises Data Gateways
In Power BI, Power BI bridges provide secure and efficient data transfer between on-premises data sources and Power BI, Microsoft Flow, PowerApps, Azure Logic Apps, and other Microsoft cloud services. These gateways enable businesses to retain their data on-site while benefiting from cloud-based tools.
Two main types of On-Premises Data Gateways exist:
- Personal Mode: Suited for single-user scenarios, offering quick setup but limited scalability.
- Standard Mode (On-Premises): Geared towards enterprise use, supporting multi-user environments, advanced data sources, and high availability through clustering.
Key Features:
- Security: Data is encrypted during transfer, ensuring data security.
- Scheduled Refresh: Automates updating cloud-based reports and dashboards with the latest on-premises data.
- DirectQuery: Allows real-time querying of on-premises databases.
- Multiple Service Support: Although commonly associated with Power BI, gateways support other Microsoft cloud services.
Azure Analysis Services Gateways
Azure Analysis Services (AAS) is a fully managed platform-as-a-service that provides enterprise-grade data models in the cloud. It allows organizations to host and run their tabular models without needing on-premises infrastructure. These models can be seamlessly integrated with Power BI for reporting and analysis.
While “Azure Analysis Services Gateway” isn’t standard terminology, the interaction between on-premises data sources, Azure Analysis Services, and Power BI often involves gateways. Here’s a breakdown of how it all comes together:
Azure Analysis Services and On-Premises Data:
If your AAS model sources data from on-premises databases or other data sources, you’ll need a mechanism to transfer it to Azure securely. This is where the On-Premises Data Gateway comes into play:
- Data Transfer: The gateway facilitates the secure data transfer from on-premises sources to Azure Analysis Services.
- Scheduled Refresh: You can set up scheduled refreshes to ensure the AAS model is updated with the latest on-premises data at defined intervals.
Integration of Azure Analysis Services with Power BI:
- Direct Connection: Power BI can connect directly to Azure Analysis Services using a live connection. This allows for real-time data exploration and reporting without the need to import the data into Power BI.
- Performance: As the data processing occurs in AAS, it offloads the performance strain from Power BI, enabling smooth interaction with complex models and large datasets.
Security Considerations:
- Row-Level Security (RLS): If you’ve implemented row-level security in your AAS model, it will be respected in Power BI when users access the reports.
- Encryption: Data in transit between on-premises sources, AAS, and Power BI is encrypted to ensure security.
- Authentication: Azure Active Directory (Azure AD) is used for authentication, ensuring only authorized users can access the data and reports.
Workflow:
- Model Creation: Use tools like Visual Studio with the Analysis Services projects extension to create your tabular model.
- Deployment: Deploy the model to Azure Analysis Services.
- Data Refresh: If the model sources data from on-premises configure the On-Premises Data Gateway for scheduled refreshes.
- Power BI Integration: Connect Power BI to the AAS model using a live connection. Design your reports and dashboards in Power BI.

Installation Process for Power BI Gateway
Power BI Gateway acts as a bridge, providing quick and secure data transfer between on-premises data and Power BI, Azure Analysis Services, and other Microsoft services. Understanding its installation process ensures optimal data connectivity and seamless reporting functionality.
Step 1: Downloading the Gateway Setup File
- Navigate to the official Microsoft Power BI website.
- Locate and click on the “Download” section.
- From the list of available downloads, select “Power BI Gateway.”
- Choose the appropriate version (Personal or On-premises data gateway) based on your requirements.
- Click “Download,” and the setup file (.msi) will be saved to your local machine.
Note: Ensure you have the required permissions and system prerequisites before installation.
Step 2: Installing the Setup File and Configuring Settings
Installation:
- Navigate to the location where the setup file (.msi) was saved.
- Double-click on the .msi file to initiate the installation process.
- Follow the on-screen instructions. Accept the terms and conditions when prompted.
- Choose a destination folder for installation or retain the default path.
- Click “Install” to begin the installation process.
Configuration:
- launch the Power BI Gateway application once installation is complete.
- Sign in using your Power BI account credentials.
- Choose the appropriate gateway type: “Personal” or “On-premises data gateway.”
- Specify a name and recovery key for the gateway. Store this key securely, as it will be required for any future modifications.
- Configure additional settings, such as proxy or service account settings, if necessary.
- click “Apply” to save and activate the gateway settings once configured.
Note: During configuration, ensure network connectivity is stable. The recovery key is crucial; a loss of this key might necessitate a reinstallation of the gateway.
Step 3: Establishing a Secure Connection with Your Network
Connection Setup:
- Within the Power BI Gateway application, navigate to the “Connectors” tab.
- Select “Add” to initiate a new data source connection.
- From the dropdown, choose the type of data source you wish to connect (e.g., SQL Server, SharePoint Lists, etc.).
- Input the necessary connection details, such as server name, database name, and authentication credentials.
Secure Data Transfer:
- Ensure your firewall allows outbound connections on port 443. This is required for secure data communication between the gateway and the Power BI service.
- If applicable, input proxy details by navigating to the “Network” tab within the gateway application settings.
- Validate the connection to ensure data can be fetched without errors.
Manage Users and Access Control:
- Navigate to the “Users” tab within the gateway settings.
- Add or remove users based on who should have access to the connected data sources.
- Assign roles and permissions as necessary (e.g., data query permissions, data edit permissions, etc.).
Note: Ensure that the necessary security protocols, such as SSL/TLS, are enabled for encrypted data transfer. Regularly review and update user permissions to maintain data security.
Step 4: Creating your Recovery Key
- Launch the Power BI Gateway application:
- Navigate to the directory where Power BI Gateway is installed, or search for it in your computer’s search bar.
- Double-click on the Power BI Gateway application to launch it.
- Navigate to the ‘Security’ section:
- Once inside the Power BI Gateway application, locate the ‘Security’ tab or section. This is typically found in the settings or configuration menu.
- Initiate Recovery Key Generation:
- Inside the ‘Security’ section, an option should be labeled ‘Create Recovery Key’ or similar. Click on this option.
- Specify Key Strength and Length:
- Choose the strength of the recovery key from the given options. It is recommended to choose a key with higher strength for maximum security.
- Also, select the desired length for the recovery key. A longer key generally offers better security.
- Generate Key:
- Click the ‘Generate’ or ‘Create’ button. The system will now generate a recovery key based on your specified settings.
- Record the Recovery Key:
- Once generated, the recovery key will be displayed on the screen.
- It is crucial to record this key securely, such as in a physical safe or a password manager. Without this key, you may lose access to certain features or data in the event of a primary key loss.
- Confirm Key Storage:
- Some versions of Power BI Gateway may ask for a confirmation that the key has been recorded. If prompted, confirm that you have securely saved the recovery key.
- Complete the Process:
- Click the ‘Finish’ or ‘Done’ button to complete the recovery key creation process.
Step 5: Connecting to Data Sources
- Launch the Power BI Gateway application:
- Navigate to the directory where Power BI Gateway is installed or use your computer’s search bar.
- Double-click on the Power BI Gateway application to start it.
- Access the ‘Data Sources’ Section:
- Within the Power BI Gateway application, locate and select the ‘Data Sources’ tab or option, usually situated in the navigation pane or settings menu.
- Add New Data Source:
- Click the ‘Add Data Source’ or similar button.
- A list of supported data sources will appear.
- Select the Appropriate Data Source Type:
- Browse through the list and click on the data source type that matches your requirement (e.g., SQL Server, SharePoint, Excel, etc.).
- Enter Data Source Details:
Provide the necessary connection details for your data source:
- For databases like SQL Server: Hostname, Database Name, Authentication Mode, Username, and Password.
- For file-based sources like Excel: File path and authentication if necessary.
- For online services like SharePoint: URL, Authentication Mode, and related credentials.
- Test the Connection:
- After entering all the necessary details, click the ‘Test Connection’ button.
- Ensure the test is successful. If there are errors, verify the provided details and retest.
- Save and Apply Changes:
- Once the connection test is successful, click the ‘Apply’ or ‘Save’ button to finalize the data source setup.
- Repeat for Additional Data Sources:
- If you need to connect more data sources, repeat steps 3-7 for each additional source.
Step 6: Setting Up an Administrator Account for the Gateway
- Launch Power BI Gateway:
- Navigate to the Start Menu > Power BI Gateway or locate the Power BI Gateway icon on the desktop to open it.
- Access the Gateway Settings:
- In the Power BI Gateway window, click the Settings or Gear icon at the upper right corner.
- Navigate to Administrators Tab:
Locate and select the Administrators tab within the settings panel. Add a New Administrator:
- Click the Add User or Add Administrator button.
- A dialog box will appear, prompting the user’s email address.
- Enter User Details:
- Input the email address of the user you wish to assign as an administrator. Ensure that this email address is associated with a Power BI Pro license.
- Click on Add.
- Verification:
- The added user should now appear in the list of administrators.
- Ensure that the correct permissions (such as “Admin”) are listed beside the user’s name.
- Save Changes:
- After confirming the user’s details, click on the Save or Apply button to finalize the addition of the new administrator.
- Close the Settings Panel:
- Once you have successfully set up the administrator account, close the settings panel by clicking the X or Close button at the top-right corner.
- Completion:
- The designated user now has administrative rights for the Power BI Gateway and can manage data sources, schedules, and other configurations as needed.
Note: It’s recommended to periodically review and update the list of administrators to maintain the security and integrity of your Power BI Gateway setup. Always ensure that only trusted individuals have administrative access.
Unleash the Power of Data Visualization with EPC Group’s Power BI Consulting Services
In today’s data-driven business landscape, understanding complex datasets is essential for making informed decisions. Our Power BI Consulting Services are uniquely tailored to help organizations transform raw data into visually engaging and intuitive dashboards and reports. With our expertise, companies can harness the power of Microsoft’s cutting-edge Power BI platform, making extracting actionable insights from vast volumes of data seamless and straightforward.
Our team of seasoned experts not only provides training and implementation support and offers strategic insights to ensure that businesses maximize their data visualization potential.
With us, your organization can elevate its data analytics capabilities, fostering a culture of data-driven decision-making. Take your data visualization to the next level.
Reach out to EPC Group’s Power BI consultants and let us help you craft a bespoke solution that propels your business forward.
Frequently Asked Questions
- How to Manage Power BI Gateway Effectively?
To manage Power BI Gateway effectively, ensure you install the latest version and designate trusted administrators. Regularly update data source credentials, monitor performance metrics, and review user permissions. Addressing issues promptly and leveraging Microsoft’s documentation will optimize your gateway’s efficiency and security.
- Can Power BI Gateway connect to on-premises and cloud-based data sources?
Yes, Power BI Gateway facilitates connections to on-premises and cloud-based data sources. It acts as a bridge, enabling secure data transfer from on-premises sources to Power BI while seamlessly integrating with various cloud-based services and platforms.
- What is the difference between DirectQuery and Live connection in Power BI Gateway?
DirectQuery retrieves fresh data from the source for each report interaction, without storing data in Power BI. Live Connection, used primarily with Analysis Services, links directly to a model without duplicating data, allowing real-time data access and leveraging server-side models and aggregations. Both methods bypass data storage in Power BI.
- How can Power BI Gateway be configured for scheduled data refresh?
First, to configure Power BI Gateway for scheduled data refresh, ensure the gateway is installed and running. In Power BI Service, set up a dataset to use the gateway, then define the data source credentials. Finally, establish the desired refresh frequency and time within the dataset settings.