All organizations will need to make updates or changes to their Office 365 and/or SharePoint 2013 lists and libraries as the business and organizational requirements change and SharePoint evolves. Whether the need is to add a column, change the name, or even delete a list, this section provides insight into the settings available for lists and libraries that enable them to be modified.
Modifying List and Library Settings
Now you are able to review the types of settings that can be changed in lists and libraries. The goal is to provide an overview of which types of settings can be changed within a list or library. After reviewing changes in lists and libraries, we will unveil a variety of settings for lists and libraries that are available from a best practices and “in the trenches” approach.
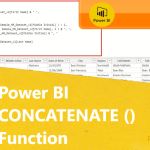
When adding columns to a custom list, you first need to go to the List or Library tab on the ribbon menu and select either List Settings or Library Settings. In the image below, the settings available for a list are shown. Let’s now take a deeper look at the General Settings for lists and libraries.
Updating General Settings
When you are viewing General Settings available for a list or library, the following options are available:
- List Name, Description, and Navigation
- Versioning Settings
- Advanced Settings
- Validation Setting
- Rating Setting
- Audience Targeting Setting
- Form Settings
We will start by looking at the List Name, Description, and Navigation settings. In the image below, you can see that these settings are fairly straightforward. You can update the name of the list, give the list a description, and specify whether the list is shown on the Quick Launch menu.
In these settings, you can specify whether content approval is required, as well as which items must remain in draft state until they are approved.
As shown in the image below, you can specify item/document versioning settings, such as the number of versions to retain for recovery and whether to update version numbers for every edit. Finally, you are able to set draft item security, which limits the users who can see items still in the draft stage, which can be very useful for document libraries.
Under General Settings, the Advanced Settings option, as shown in the image below, provides users the ability to enable/disable multiples features for a list or library, including content types, attachments, folders, and search options. These settings enable the user to set item-level permissions based on the access they have been granted. This setting can limit users to only view/edit the items that they created or prevent any edit permissions at all.
General Settings and Validation Settings are vital pieces of these functionalities, which are covered going forward in greater detail.
Validation Settings, as shown in the image below, are a convenient tool when you are creating a solution using a SharePoint list or library. Validation enables you to specify rules based on the data contained in the list fields to validate the list item.
For example, if we take a look at a custom list that was designed to store the uniform sizes for a Little League baseball team for which a company was sponsoring, we can create a rule that says, “Shoe Size must be less than 15,” from a formula such as this: (= [Shoe Size] < 15).
The formulas work very similar to Microsoft Excel formulas and include many of the same functions available in Excel. SharePoint 2013 and/or Office 365’s SharePoint Online also provide Rating Settings, which enable you to specify whether your list can be rated by users, as well as the type of rating system that will be used. You may allow users either to just “Like” your list or to actually rate your list on a scale.
Audience targeting enables users to specify their target audience for a list item. When you are enabling audience targeting and creating a column in your list or library, end users now can be specifically associated with the users or group that the list item is targeting. This information can then be used by web parts, such as the Content Query Web Part, to filter results based on the user’s context.
Deleting a List or Library
When a list or library is no longer being used, there must be parameters in place to audit and explore the value of these sites. Deleting unused lists and libraries makes for a clutter free SharePoint environment. Deleting a list or library is an easy task that can be accomplished in the List/Library settings page, which can be accessed from the ribbon menu.
Select Delete This List, as shown in the image below, or Delete This Document Library, and confirm the action by clicking OK.
It is crucial to consider the impact of deleting the list from your site. You will want to make sure that the list or library is not being used by any custom solutions or web parts in your environment. You also want to make sure that deleting the list will not cause issues with any lookup columns. Always remember, however, that when a list or library is deleted, you can still recover it from the Recycle Bin.
Changing Permissions for a List or Library
By default, list and library permissions are inherited from their parent site. We will now cover granting unique permissions that are not inherited from the parent site.
One thing to remember when creating unique permissions for a list or library is that after you stop inheriting from the parent site, all permissions added to the parent need to also be added to the list as needed. If you select the Permissions for This List link on the List Settings page shown earlier, you should now see the page as shown in the image above.
The first step to creating unique permissions for a list or library is to ensure that it is not inheriting its permissions from the parent site permissions. You can achieve this by clicking Stop Inheriting Permissions on the Permissions Settings page, as shown in the image below. A prompt to confirm this action appears, and you should click OK.
This then leads you to granting the desired permissions using the Grant Permissions menu option, as shown in the figure below. Now you can start granting permissions manually using the Grant Permissions menu option. You can grant permissions either to groups or directly to users. If at any time you want to remove the unique permissions and revert to inheriting permissions, you can simply select the Delete Unique Permissions menu option and confirm it.
EPC Group’s Nationally Recognized Practice Areas
EPC Group leading Custom Application Development, SharePoint, Office 365, Infrastructure Design and Business Intelligence Practice areas continue to lead the way in providing our clients with the most up-to-date and relevant information that is tailored to their individual business and functional needs.
Additional “From the Consulting Trenches” strategies and methodologies are covered in EPC Group’s new book, “SharePoint 2013 Field Guide: Advice from the Consulting Trenches” covering not only SharePoint 2013, Office 365 and SharePoint Online but Information Management, ECM\RM and overall compliance strategies in this ever changing world of “Hybrid IT.”